
Not just another SOP story: How to program a rotary evaporator method
Performing routine methods and SOPs on your rotary evaporator is easiest if the method can be programmed, saved and run automatically. Programming an SOP might sound scary and off-putting, but it is not so bad. In this blog post, I walk you through the process of setting up a 4-step method on your rotary evaporation system, so you could save yourself time and trouble when performing SOPs repeatedly.
One of our neighbors has a six-month old baby and she invited my wife and me the other day to have lunch with them. The little one was just starting to eat solids, so it was very entertaining for us to watch her gobble down mashed carrot with such pure joy. Her mother was incredibly pleased that she had just bought herself a kitchen robot. She explained that she simply needs to program in a recipe, add all the ingredients to the bowl and out comes something yummy, for baby and for the rest.
Yes, I know some of you are rolling your eyes, especially those of you who like to get your hands dirty and cook up a storm. But there are a few standard, routine recipes where it would be nice to save time and energy and get to the result effortlessly.
I mean, the lab is the same, if you think about it. Sure, some experiments are wild and you want to really get into them and are excited about them. But there are also the repetitive, routine, standard methods, which are even appropriately called SOPs.
Not only would something like a programmable kitchen robot help you save time and energy when performing SOPs, really automating the process helps improve the reproducibility of it. When you program the method well, anyone who does it should end up with the same result. And isn’t that the point of SOPs?
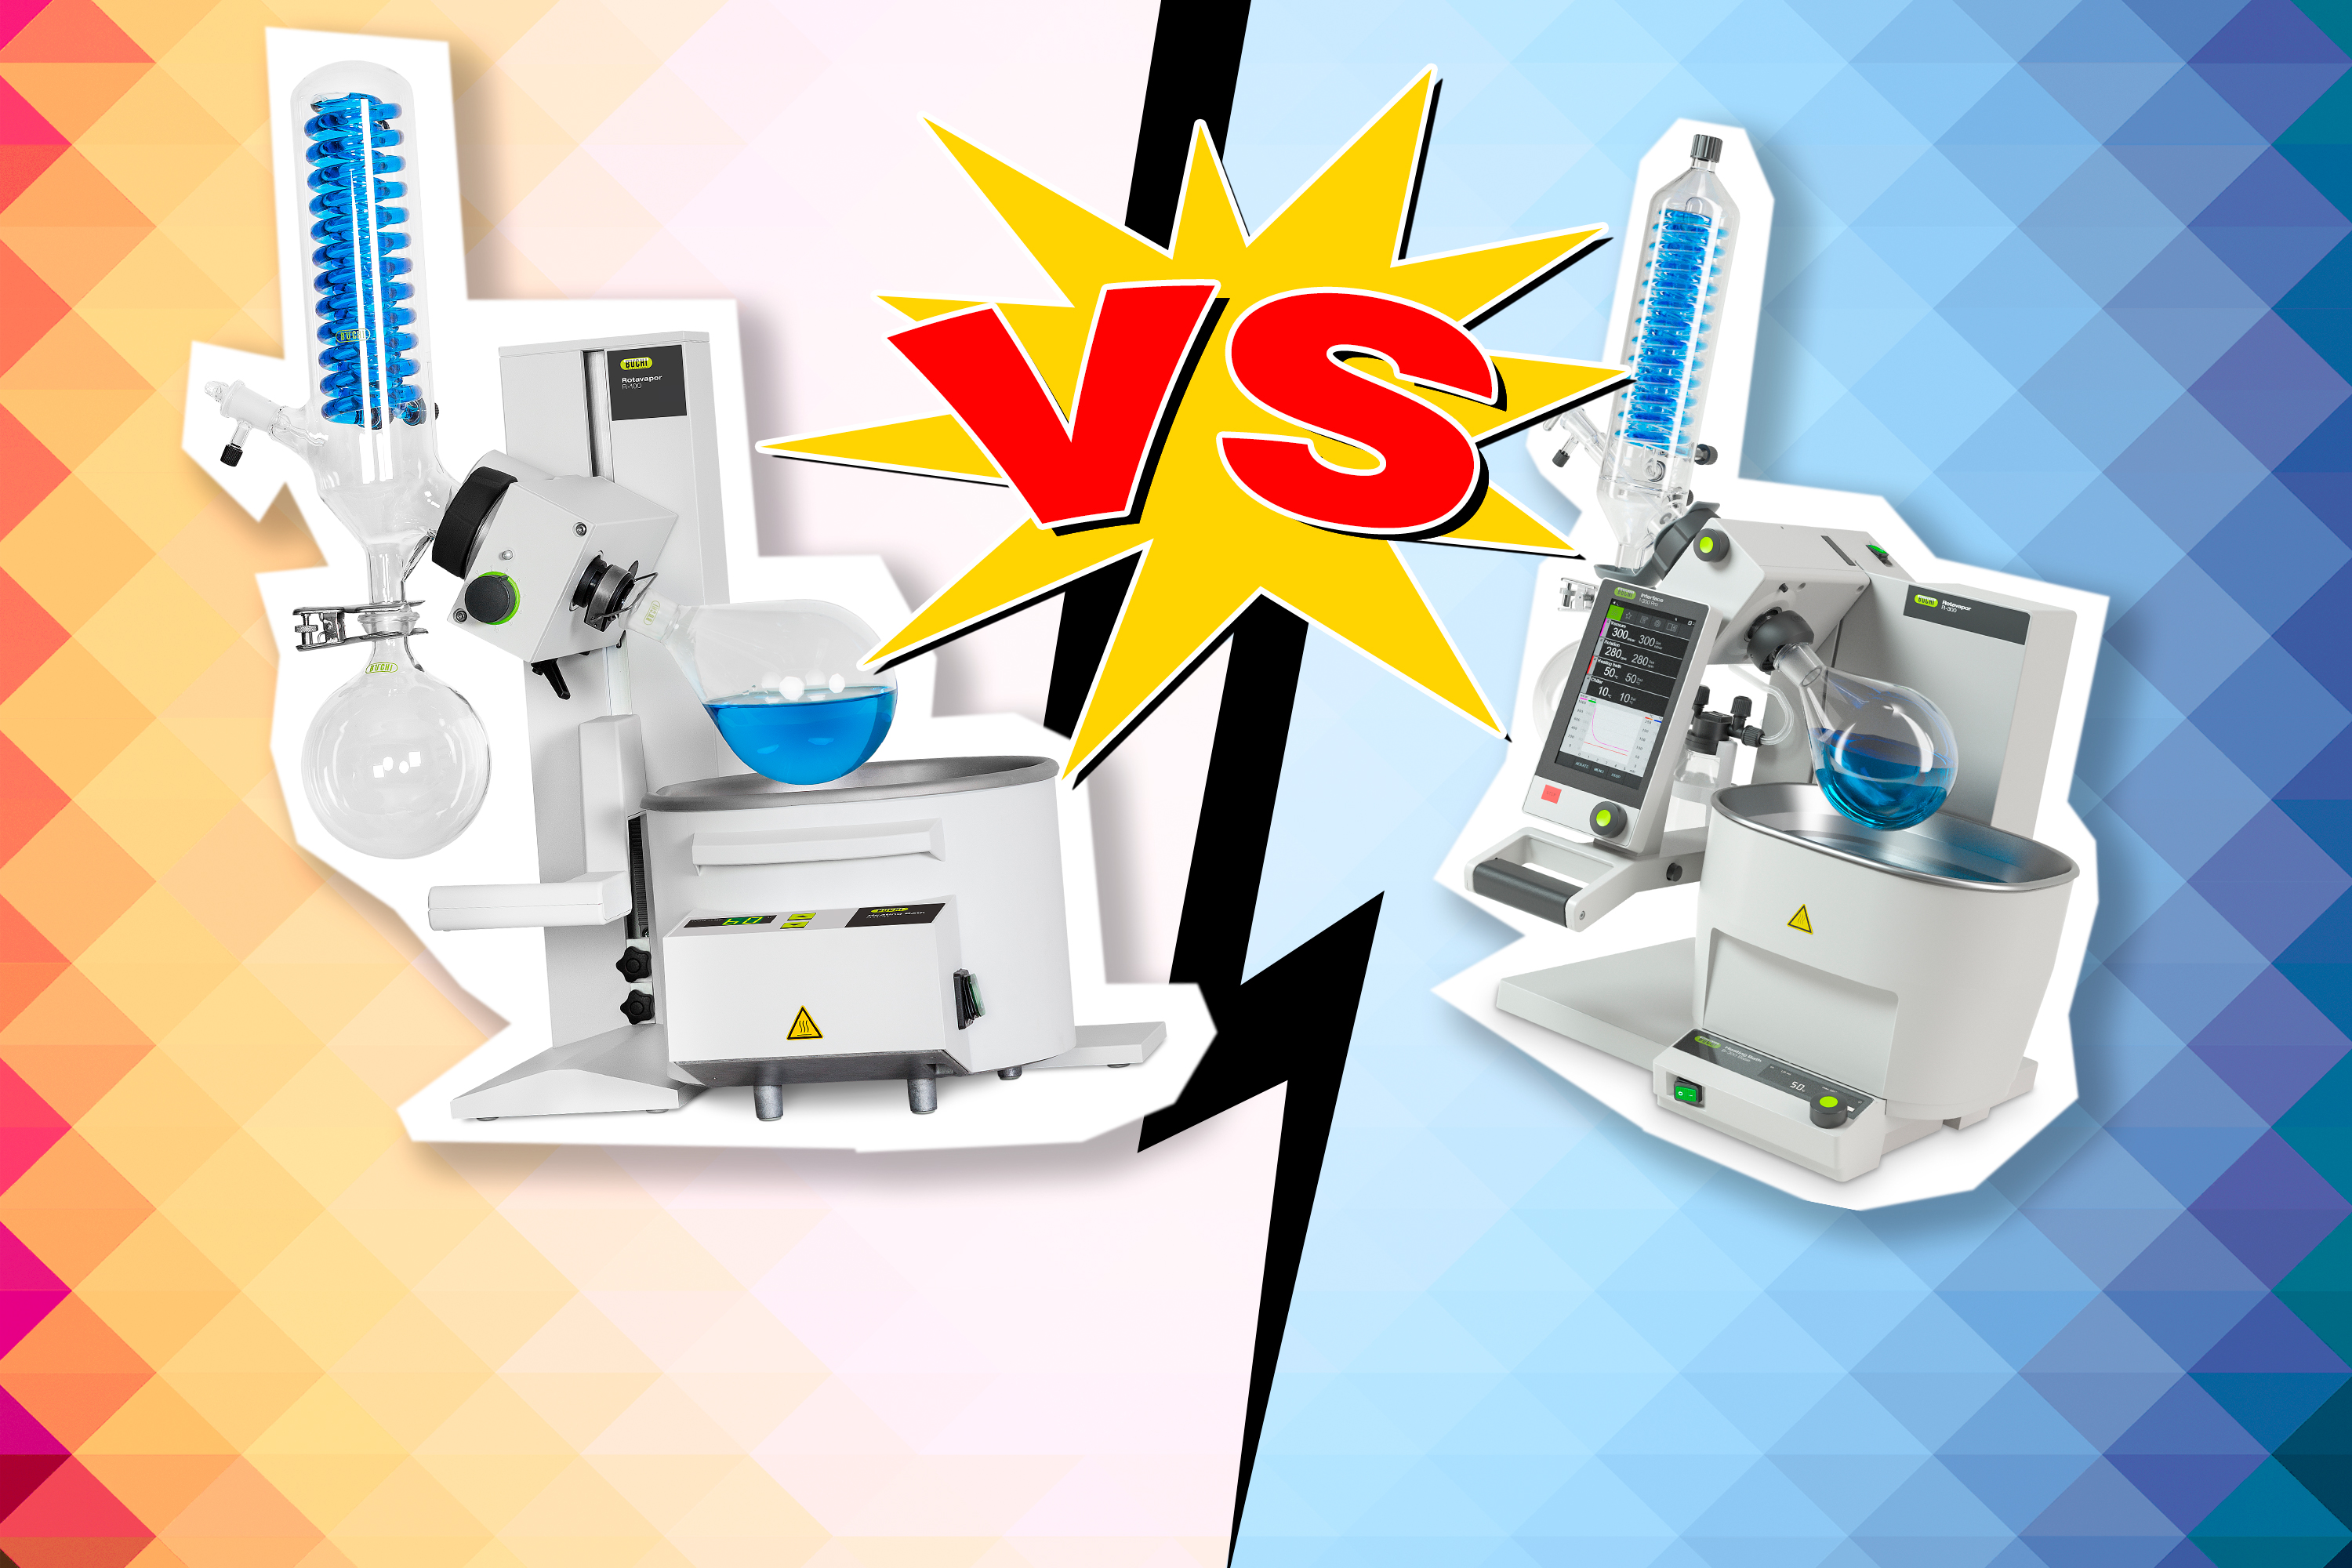
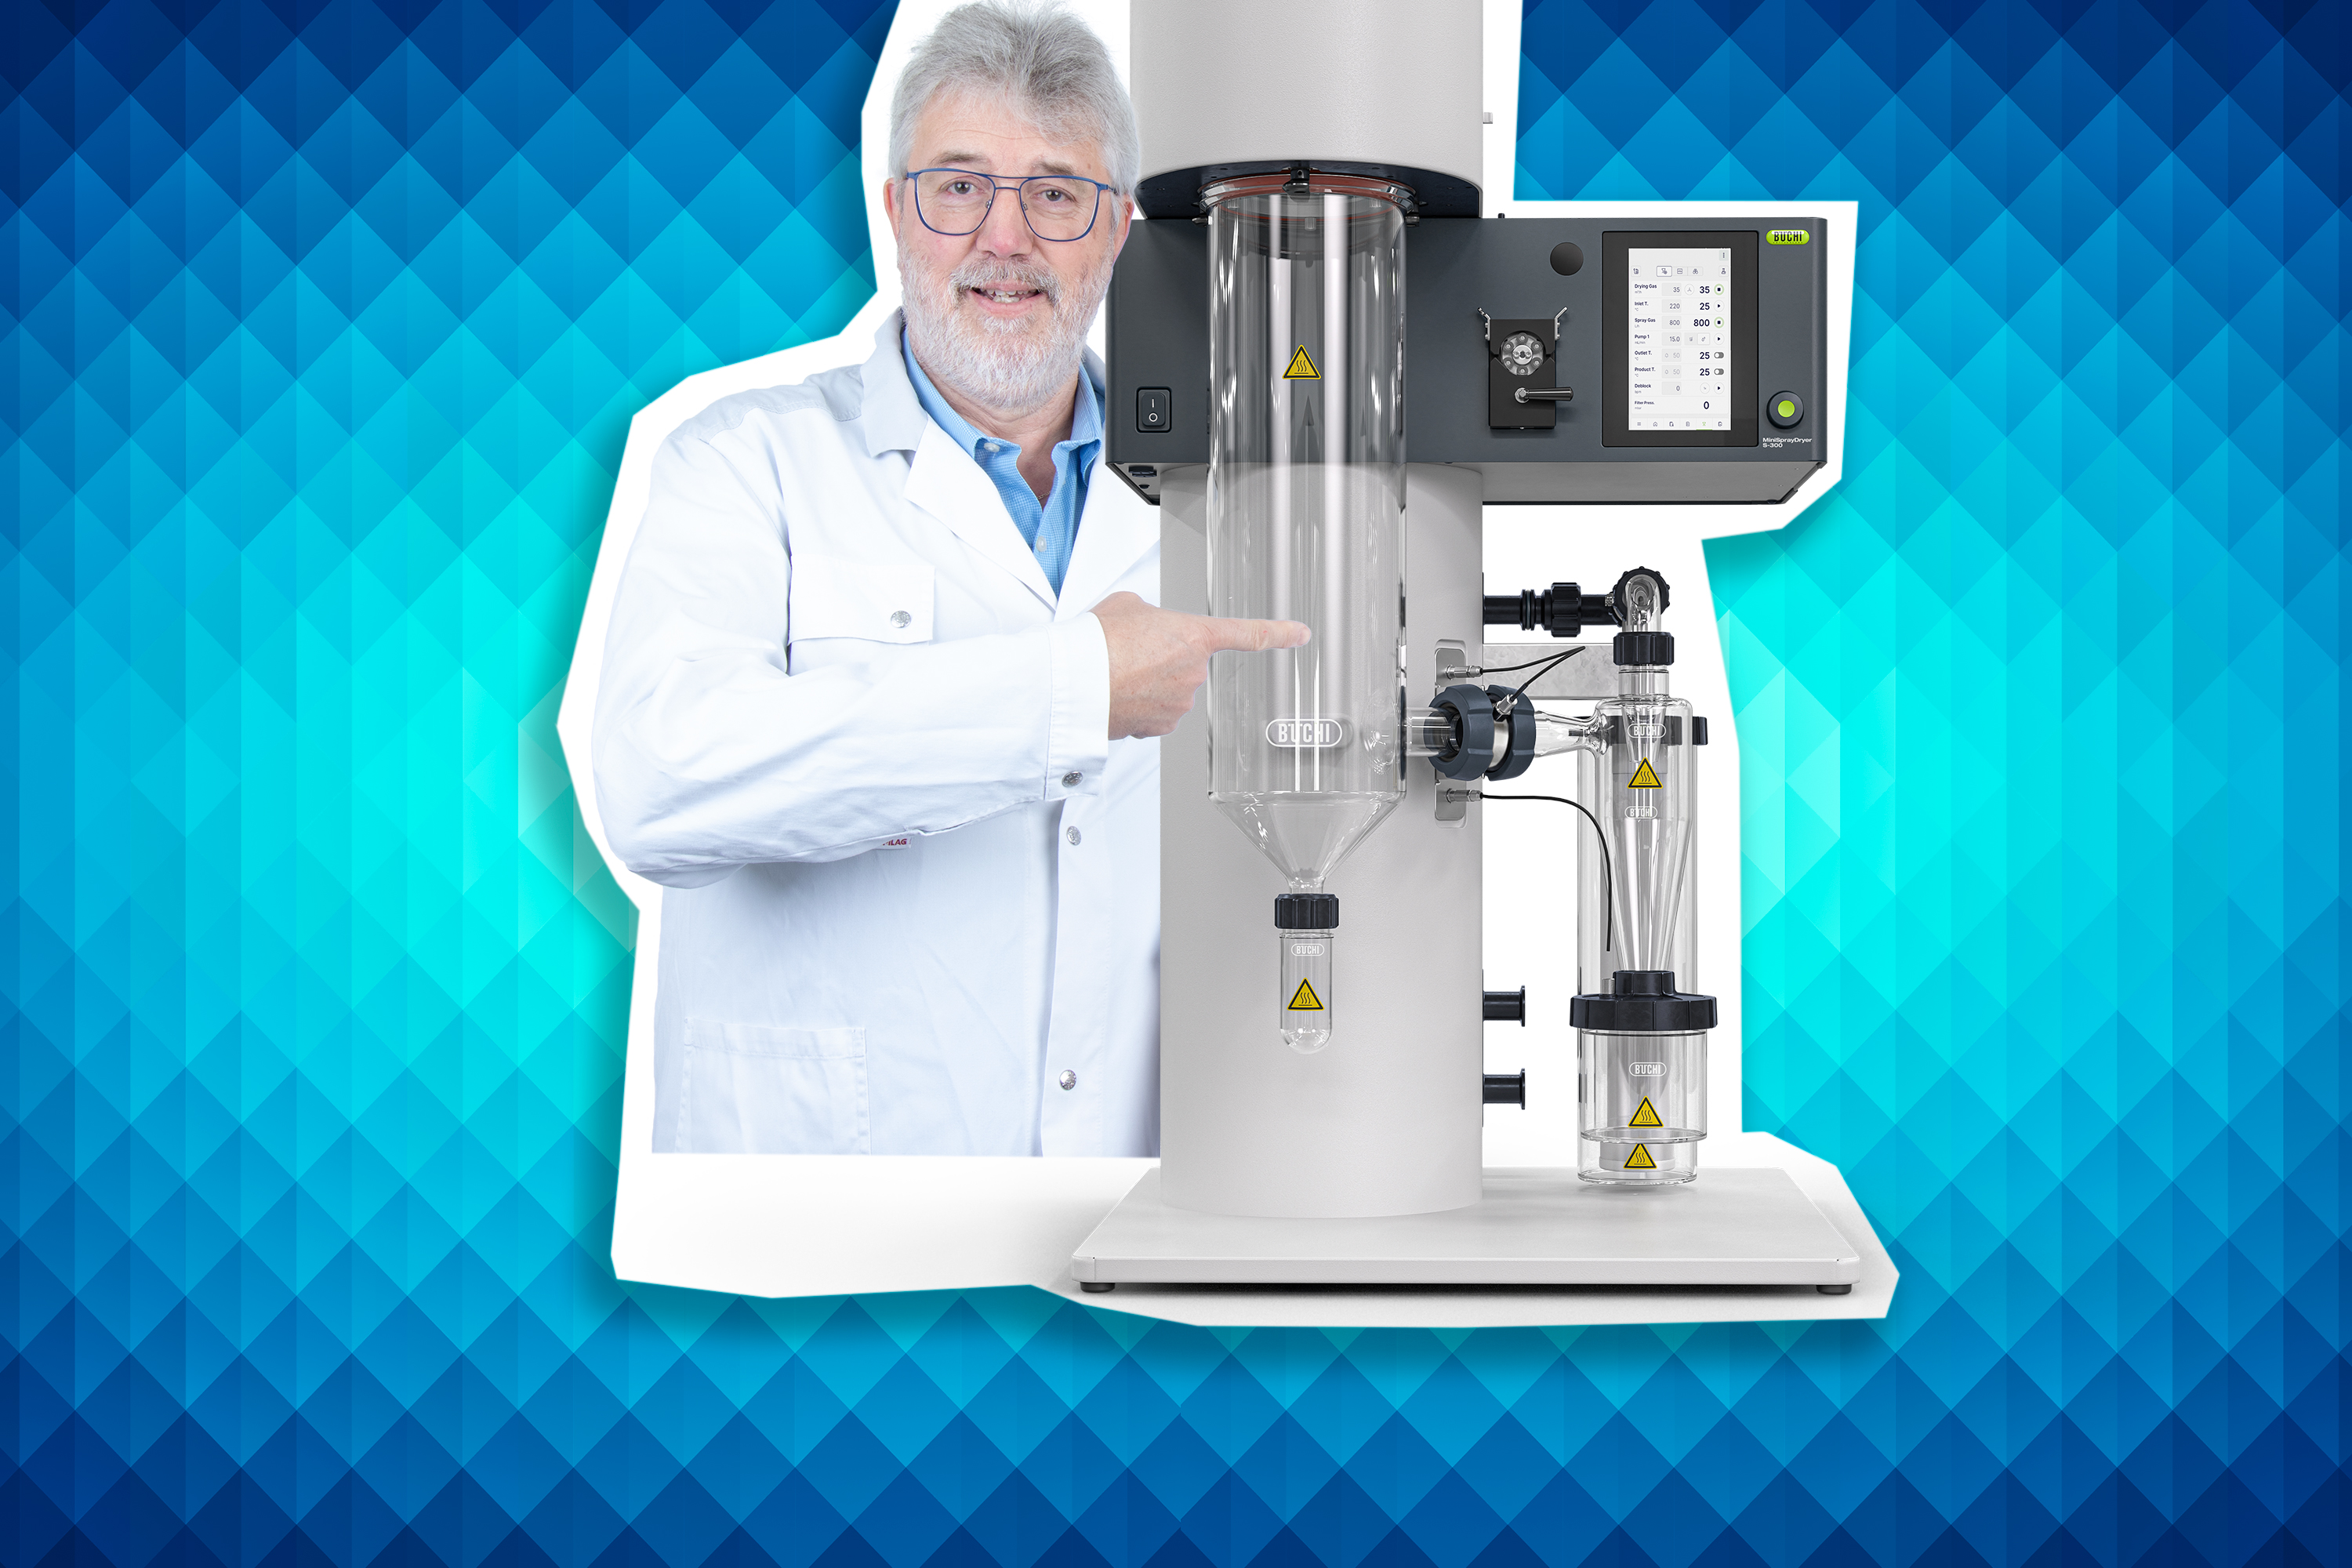
Luckily, some rotary evaporators are a little bit like kitchen robots, if they come with some programmable parts. For example, the Rotavapor® R-300 comes with Interface I-300 Pro, where you can set up and save a method quickly and easily.
Different laboratories have various or even multiple SOPs for their rotary evaporators, depending on application and specific needs. But I’d like to walk you through an example SOP and how to program it so you can make your life easier.
Let’s take a method that is a bit more complex, for example an SOP with a gradient. This is an ideal method that would require programming, as without this, you would otherwise need to manually adjust system parts.
For example, you want to perform a rotary evaporation that starts at ambient pressure values and decreases to 100 mbar where it remains for a few minutes. Then you want to empty the receiving flask and finally dry the solvent.
If your rotary evaporator allows it, how can you go about programing this method?
First you need to think about how to divide the method into multiple distinct steps. In the above example, you could split up the method into four steps:
First step: gradient from ambient pressure to 100 mbar in 5 minutes
Second step: vacuum constant at 100 mbar for 15 minutes
Third step: empty the receiving flask and put it back
Fourth step: dry the remaining solvent with a vacuum at 10 mbar for 10 minutes and with the dry mode
You should be able to set this up on your interface, for example as below:

Then you need to define each step, considering parameters such as:
Vacuum start – initial pressure value
Vacuum end – final pressure value
Timer – duration of the step
Rotation – rotation speed during step
Heating bath – heating temperature during step
Chiller – cooling temperature during step
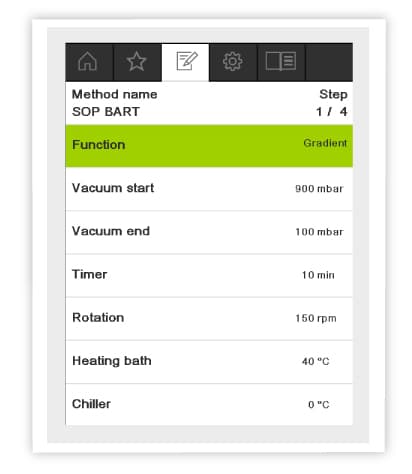
For our example, step 1 can be defined with the above parameters.
But what do you do when a manual step needs to be involved? Ideally, your system lets you program this as well with options such as:
Remove collecting flask
Remove evaporating flask
Clean condenser
Attach bath cover
Clean system
Attach collecting flask
Attach dry collecting flask
Refill solvent
Transfer content to drying flask
Attach dry evaporating flask
In our example, we would select “Attach dry collecting flask” and the rotary evaporator would pause to give you enough time to perform this task.
In the last step, we’d like to dry the solvent. Here, we again have to select the values as per step 1 and 2. I would suggest using a pressure value such as 10 mbar or any pressure value that is. A rotation speed of 50 RPM, a heating bath temperature of 40°C, a cooling temperature of 0°C for a duration of 10 minutes should do the job just fine. If the option exists, you can also set up a rotation interval, for example of 10 seconds in one direction, then 10 seconds in the other direction. The rotation interval helps prevent the compound from sticking to the walls of the flask.
Save your method then and you’re good to go.
It’s as easy as getting a pizza dough out of a kitchen robot after all!
Do you want to see a visual demonstration of how to set up Interface I-300 Pro on Rotavapor R-300. Then be my guest with the following link:
https://www.youtube.com/watch?v=m2r7ACvdF34&list=PLeFGpLqfD64VT4PpAgDg8oYWh102NjaR7&index=3
And if one video isn’t enough for you, check out my birthday blog post where I recommend great clips on rotary evaporation. Surely, once you program your SOP, you will have all the time in the world to watch movies, rather than stand idly by your rotary evaporator! And I now have time to think of what else I will cook up for our next blog post. Feel free to leave me an idea in the comments section below!
Till next time,


WANT TO STAY IN TOUCH?
Click on the button and receive the latest posts directly in your messenger!
Related Posts

Warm and Colorful Goodbye from Bart
After 136 posts filled with knowledge, Bart announced his retirement. Read here his goodbye message. →
Go Big or Go Home: Scaling-up Spray Drying Processes from Laboratory to Industrial Scale
Bart explains the differences between performing spray drying on a laboratory and industrial scale. →

Don’t be a Drip: Perform Chromatography in a Flash
Bart describes the processes of open column and flash chromatography and explains the critical factors that need to be considered when switching approach. →
Protein Preservation: Critical Factors Affecting Freeze Drying Formulations
Bart compares freeze drying formulas with soil preparation to explain how best to preserve and freeze dry proteins and peptides. →

In Pursuit of Purity: Chiral Column Screening and the Separation of Ketaprofen using SFC
Bart explains the importance of column screening in SFC, using the example of separating ketoprofen. →

Understanding Energy Balance to Optimize Lab Efficiency: Rotary Evaporation
Bart explains how the Laws of Thermodynamics influence energy balance in the laboratory. →

Keeping your Cool: Essential Tips for Freeze Dryer Maintenance
Bart gives some useful tips for how to maintain freeze drying equipment to ensure its longevity and guarantee optimal performance. →

A Tale of Two Techniques: How to Choose between prep HPLC and prep SFC
Bart explains how to choose between prep HPLC and prep SFC. →

The Explosive Truth: Unpacking the importance of ATEX certification.
Bart explains the ATEX directives and how EX-proof instruments ensure safety in high-risk environments. →

A Breath of Fresh Air: Formulating Inhalable Drugs through Spray Drying
Bart explains how inhalable drugs work and how to create them using spray drying. →

As Easy as ABC: How to Use the Van Deemter Equation to Optimize Your Chromatography
Bart explains the Van Deemter Equation and explains how it is used to optimize different chromatography methods, such as, prep HPLC and prep SFC. →
The Evolution of Evaporation: From Ancient Alchemy to Modern Science
In this blog, I would like to talk about the history and future of rotary evaporation, a process I have had tremendous experience with over the years. →

Chilling Out! How to perfect the freeze drying process
The importance of spray drying , I would like to take the time to focus on a different method used to remove moisture from a product. →

Chiral Compound Confusion: Bart explains how SFC is used to purify enantiomers.
I would like to focus specifically on chiral compounds, also known as enantiomers. →
Getting Hands-on with SFC: Bart explores the application possibilities of supercritical fluid chromatography
Explaining what applications are possible with SFC →

Maintenance Matters! The importance of keeping your equipment in tip-top shape
The power of prevention is of particular importance when it comes to the maintenance of laboratory equipment. →

The Never Contented! How spray drying enables batteries to keep on keeping on.
Bart explains how spray drying technology is used to improve battery performance. →

Stay cool and protect your analytes: Maceration vs. continuous cold extraction on a rotavapor
In this post, I shall compare two methods for performing extractions on heat-sensitive samples. →

Shining a light on automated evaporation solutions
Bart explains how the latest automated features on rotary evaporators makes the sample preparation process of solid loading a breeze. →

Let’s get critical! SFC vs. HPLC
Bart explains the history of SFC and how it has developed over the years. SFC is then compared with HPLC. →

Celebrating chromatography for the blog’s 5th blooming birthday
Bart celebrates the blogs 5th year by explaining how chromatography was invented by Mikhail Tsvet. A simple experiment is described that explains the key concepts. →

What’s coming up in 2023
The New Year always provides an opportunity to look forward and to reflect. As I have embraced retirement, I have found more time for reflection. →
Develop flash and prep HPLC applications to purify a range of compounds
Bart explains the versatility of Flash and Prep HPLC applications to ensure the successful purification. →

Leaks giving you the freaks? How to perform a leak test on your rotary evaporator
Bart Explains how to find and prevent leaks in rotary evaporators… →

Flavor of the day: How to spray dry flavors and fragrances part 2!
Bart describes spray drying parameters and particle characteristics when encapsulating flavors and fragrances →

A fat lot of tips on how to purify lipids
Bart offers advice on how to purify lipids, including phase selection, sample loading and detection methods →

A whiff of microencapsulation of flavour and fragrances by spray drying
Bart goes over the benefits of microencapsulation, carrier materials and factors affecting emulsification →

Pump it up: clean vacuum pump in six easy steps
Bart explains when you should clean your vacuum pump and how to most efficiently get the job done →
Solving the chromatography solvent problem
Bart examines mobile phases used in normal and reversed-phase chromatography →

The role of spray drying in gene therapy
Bart offers spray drying parameters from literature on spray drying nucleic acids for delivery approaches in gene therapy →

Taking the heat off cleaning your heating bath
Bart goes through the 12 simple steps you need to clean the heating bath of your rotary evaporator →

How to spray dry nucleic acids
Bart explains why and how you should spray dry nucleic acids for gene therapy →

Your supplement on vitamin purification
Bart discusses how to adapt chromatography methods to vitamin applications →

How to clean the glassware of your rotary evaporator
Bart highlights seven steps for cleaning the inner and outer glassware parts of a rotary evaporator →
This is what a next-generation spray dryer looks like
Bart introduces a new spray drying system and offers six points on why the instrument is a must for laboratory spray drying →

Why HILIC is what your polar compounds need for purification
Bart explains how HILIC works and why it is a suitable method for separating polar substances →

Four rotary evaporation tricks to keep your safety standards high!
Bart highlights the importance of plastic-coated glassware, secondary condensers, splash shields and level sensors for safety during rotary evaporation →

Episode 100: An investigation into freeze-drying and spray-drying effects on peptides
Bart reviews a paper on effects of freeze drying vs. spray drying on bioactives →

How to use your rotary evaporator for freeze-drying sample preparation
Bart guides you through using a Dewar accessory on a rotary evaporator for lyophilization sample prep →

Don’t mess with my flow! How to solve three common solvent flow problems in chromatography
Bart helps diagnose and cure solvent flow problems →

Watering your knowledge on spray drying and freeze drying
Bart offers a general overview and comparison of spray drying and freeze drying →

Flash chromatography vs prep HPLC: you want speed or precision?
Bart compares open column chromatography, flash chromatography and prep HPLC →

Five glassware accessories that those doing rotary evaporation swear by
Bart discusses the importance of five glassware accessories in rotary evaporation →

Are compounds in your sample ghosting your chromatography detection method?
Bart gives an overview of theory, benefits and limitations of five common detection methods in chromatography →

Super special edition: Interview with Bart for blog’s 4th birthday!
Bart participates in a personal Q&A offering insights into his life and his science interests →

Who is your favorite member of the rotary evaporation family?
Bart matches industrial, parallel and lab evaporators to their most suitable applications →

What’s written in the stars for rotary evaporation, chromatography and spray drying?
Bart makes his 2022 predictions for chemical and pharma R&D labs →

All I want for Christmas is some chemistry webinars!
Bart gives you lots of holiday viewing with webinars on chromatography, proteins, natural products and more →

What’s the BIG deal with industrial evaporation?
Bart discusses differences and how to upscale from lab to industrial evaporation →

Three chromatography system parts and why they are important
Bart focuses on use and importance of fittings, hoses & tubes and ports in chromatography →

How to make your protein formulation last and last and last
Bart offers tips on using spray drying and freeze drying for protein formulations →

Are you team “spray dry” or “freeze dry” when you formulate proteins and peptides?
Bart compares spray drying and freeze drying for protein applications →

Five essential steps in the drug discovery and development process
Bart discusses the methods for extraction, concentration, purification and formulation of APIs →

Two reasons why prep HPLC users love analytical chromatography
Bart explains how to use analytical chromatography to develop an optimized prep HPLC method →

Why you should avoid grease in your rotavapor with a PTFE Stopcock
Bart describes the dangers of grease for your rotary evaporation and how to use a PTFE stopcock to solve this challenge →

This method of concentrating natural products is really a force of nature
Bart explains how to use rotary evaporation to concentrate natural ingredients →

Tickling those taste buds: Rotary evaporation for flavour creation
Bart offers his chef's kiss on how to use rotary evaporation to create flavours for mixologists and chefs →

How to freeze dry PCR diagnostic kits for COVID-19
Bart details the five steps needed for the lyophilization of PCR diagnostic kits for various diseases →

Concentrate on this: Tips for concentration of proteins and peptides
Bart offers tips on how to optimize rotary evaporation and freeze drying for protein concentration →

Is your evaporation instrument the perfect match to your application?
Bart looks at different applications of rotary evaporation and which evaporation system is better suited to them →

Rotary evaporation vs freeze drying in protein concentration
Bart lists factors that help determine if rotary evaporation or freeze drying is more suitable for your protein concentration →

Let’s match a vapor duct to your rotary evaporation application
Bart discusses three applications of rotary evaporation and what vapor duct is most suitable for each one →

Tips on equilibration and storage of flash cartridges and prep HPLC columns
Bart offers insights into how to properly equilibrate and store your flash cartrdiges and prep HPLC columns →

Seven indicators your rotary evaporation glassware is of good glass quality
Bart explains the telltale signs of good quality glassware used in rotary evaporation →

Purification of natural compounds can come this naturally to you. Here is how.
Bart gives advice on how to develop a chromatography method for purification of natural products →

How to find the perfect stationary phase for your protein purification
Bart discusses what types of chromatography and stationary phases are well suited to protein purification applications →

Three parameters you need to boost your distillation rate
Bart shows how to improve distillation rates through optimal heating bath temperature, condenser loading and flask size →

Happy birthday to me: The blog turns three and it’s all about the accessories!
Bart celebrates the blog's birthday with resources on accessories in chromatography and rotary evaporation →

How to efficiently maintain a flash chromatography system
Bart details how to take care of the pump, detector and fraction collector of a chromatography system →

Your 2021 chromatography and rotary evaporation crystal ball
Bart offers his outlook on how the chromatography and rotary evaporation markets will develop in 2021 →

Should I stay or should I go
Bart announces his retirement, but promises to continue writing for the blog →

Let’s wrap up this unusual year with an unusual post
Bart says goodbye to 2020 with four chromatography and rotary evaporation videos for faithful blog readers to enjoy over the holidays →

7 highly important factors for cannabinoid isolation
Bart lists seven factors that are important for successful of separation of cannabinoids using chromatography →

Foam is foe in rotary evaporation. Here is how to prevent it.
Bart discusses why foam formation is dangerous and how to prevent foam in your evaporation flask →

Slurry packing of chromatography columns can be just as fun as it sounds
Bart explains the slurry packing process for chromatography columns →

Condenser loading should not be at 100% and here is why.
Bart discusses optimal condenser loading and why it is important →

Dry packing of a chromatography column in three steps
Bart explains how to dry fill a chromatography column →

Why 15 is the magic number for your recirculating chiller
Bart shows how to calculate cooling capacities and discloses how to set up your recirculating chiller to achieve sufficient condensation →

How RFID technology lifeguards your chromatography process
Bart explains how and why RFID tags are used on chromatography cartridges and racks →

Sizing up the importance of flask size in rotary evaporation
Bart discusses theory and experimental data on how flask size affects evaporation performance →

Are peak splitting and peak fronting effects keeping you up at night?
Bart talks about peak fronting and peak splitting and how to eliminate these effects in chromatography →

Why you should give the glass thickness of your evaporation flask a second thought
Bart discusses how the glass thickness of a flask affects evaporation performance and safety →

The perfect peak shape: Five solutions to peak tailing problems
Bart explains how to analyze peak shape with the tailing factor and asymmetry factor and offers five causes and solutions for the peak tailing effect →

Five ways to optimize the pressure values of your rotary evaporation
Bart offers five tips for finding the ideal pressure settings for rotary evaporation of a solvent →

What’s hidden behind your cosmetics labels? Chromatography!
Bart highlights the role of chromatography in ingredient discovery for development of cosmetics →

How the delta 20 rule can make all the difference in your rotary evaporation
Bart describes the golden delta 20 rule for finding optimal temperature values for laboratory evaporation →

The joint relationship between chromatography and cannabis
Bart talks about the purification of cannabinoids like CBD from cannabis using flash chromatography and solvent recycling →

Five cases where the bigger the condenser, the better
Bart explores the relationship between condenser size and distillation rate with specific examples and experimental data →

All about ELS detectors – part 002
Bart discloses valuable information on ELS detectors in his sequel post on the topic of ELSD →

Eco-friendly rotary evaporation is possible and here is the evidence
Bart shares energy savings data from using eco-friendly features on a rotary evaporator →

How to solve two challenges of UV detectors in chromatography
Bart gives advice on how to overcome two common challenges of UV detection in chromatography →

Is your rotary evaporator well configured?
Bart jumps into rotary evaporation by discussing current applications and how to configure your own rotary evaporator →

The blog turns two, but you get all the presents
Bart's Blog turns two, offers chromatography presents, introduces rotary evaporation as a regular topic →

How to separate very polar substances without destroying your packing material
Bart shares how to separate very polar compounds using a stationary phase ideal for this purpose →

What does liquid chromatography have in its 2020 fortune cookie?
Bart shares his predictions on where liquid chromatography is heading in 2020 →

A look back at your favorite chromatography and freeze-drying posts from 2019
Year-in-review: Bart offers a summary of the most read freeze-drying and chromatography posts in 2019 →

Why the retention factor needs to be kept in check
Bart offers the ideal retention factor range for achieving good resolution in chromatography while keeping running times and costs low →

Why a bit of moisture in freeze-dried products can be a good thing
Bart discusses the danger of overdrying during the freeze-drying process and how moisture mapping can help achieve optimal moisture content in products →
Does anyone in chromatography give a load about the sample load?
Bart talks about sample overload in chromatography and how it affects plate height, column efficiency and resolution →

A load of tips on how to prevent condenser overload
Bart describes how freeze-driyng rates, condenser ice capacity and other parameters can be used to prevent condenser overload →

Five good reasons to attend my live Q&A chromatography webinar
Bart invites readers of his blog to join a live Q&A chromatography webinar where he personally answers their purification questions →

Simple ways to take the edge off the edge vial effect in freeze drying
Bart draws attention to the edge vial effect and how to reduce its negative impact during the freeze-drying process →

How to master chromatography in two days
Bart invites users to an advanced user chromatography training →

The poster that could put Bart’s Blog out of a job
Bart offers a sneak peak into a free chromatography poster with the basic principles needed to perform perfect flash chromatography and prep HPLC →

What happens if you run your freeze drying process under direct sunlight
Bart experiments with the effect of direct sunlight on freeze drying performance and draws attention to how the environment can influence lyophilization →

We need to talk about flow rate and column efficiency in chromatography
Bart discusses how an optimized flow rate helps improve the column efficiency of flash and prep HPLC chromatography →

How to find a suitable pressure endpoint criterion for freeze drying
Bart discusses comparative pressure measurement and how to use it for endpoint determination of freeze-drying steps →

Three major ways to influence column efficiency in your favor
Bart explains how particle size, column packing and pore size affect column efficiency and resolution in chromatography →

How to use temperature to assess if primary freeze drying is finished
Bart describes how temperature could be used for endpoint determination of the primary drying step in lyophilization →

Why you should care about column efficiency
Bart explains how column efficiency, or the number of theoretical plates, affect resolution in chromatography →

Why pressure gradients are the main drivers in improving sublimation rates
Bart discusses why a good pressure gradient is the most efficient way to improve freeze-drying rates →

Putting safety first during the chromatography process
Bart discusses how to maximize the safety of user, sample and the surroundings during the chromatography process →

A pretty hot way to speed up the freeze-drying process
Bart offers theory and experimental data on how heated shelves can speed up the freeze drying process →
Two essential aids for proper column maintenance
Bart discusses the role of pre-guards, column guards and RFID technology in proper cartridge and column maintenance →

Shall we use shell freezing to speed up manifold freeze drying?
Bart discusses the benefits of shell freezing over bulk freezing in speeding up the manifold freeze drying process →

Beware: Protecting yourself and the environment against chromatography hazards
Safe, green chromatography? Yes, you can! →

How to effectively use organic solvents in lyophilization
Bart offers advice on how to incorporate challenging organic solvents into your laboratory freeze drying process →

The blog gets older, falls in love and branches out
Bart's blog celebrates its first birthday by welcoming a new guest to the party. Lyophilization will now get regular coverage on the blog! →

Three chromatography problems the new Pure system solves
There are challenges in chromatography when it comes to user, sample and environmental safety. See how the Pure chromatography system sets out to solve them →

Four Fab Lab New Year’s Resolutions to live by in 2019
The chromatography team at Büchi lists their chromatography resolutions for 2019 and how they plan to remain funny, innovative, safe and green →

It’s time we separate from 2018 and flash in a brilliant 2019
Büchi's chromatography team gets ready to bring in the new year by talking about their favorite moments of 2018 and their plans for 2019 →

How to optimize your mobile phase to improve selectivity and resolution in chromatography
Discover methods for choosing the most suitable solvent to achieve better selectivity and resolution in your separations→

How to choose a stationary phase, optimize selectivity and get better resolution in chromatography
See the effects of selectivity on separation quality and get some great tips on how to optimize resolution by finding the ideal stationary phase for your application→

The fastest, easiest and smartest way to select a flash cartridge
Discover a brand new digital tool for flash cartridge selection. Read how the FlashPure Scout app can provide you with tips on finding the ideal cartridge, as well as technical information for method optimization→

All you need to know about using TLC data for flash method optimization
Convert your TLC results into optimized separations and learn about how certain software can convert TLC data into better purifications →

Clever ways to speed up laboratory evaporation
This post is a giant turbo button for your laboratory evaporation performance. Read on to gain fresh ideas on how to make your evaporation process faster →

How to quicken laboratory freeze drying procedures
The freeze drying process in the lab can be fun, but as with all common chemistry methods, the sooner it is done, the better. Learn how to quicken it and download the poster →

Top tips on how to save time in chromatography
Get some great suggestions on how you can speed up your chromatography runs and save valuable time →

The most important factors to consider when selecting a flash chromatography cartridge
See what important parameters you should consider when choosing a flash cartridge and get insights into how to simplify the selection process →

How to overcome limitations in flash chromatography with an ELSD
Find out how ELSD functions and what benefits this detector can bring to your chromatographic experiments compared to UV detectors alone →

World Cup Fever: How to Score Purer Compounds by Improving Resolution in Chromatography
Soccer fans or not, all chemists want to give impurities a red card. Read today how to improve resolution and score purer compounds →
How to do sample introduction in Flash Chromatography?
When introducing a sample in flash chromatography, are you going for Wet or Liquid Loading? Learn about the two sample introduction techniques and how they influence the sample loss during the purification process →

Warm and Colorful Welcome from Bart
Hello there and welcome on the blog!
This place is for all colorful researchers out there who are looking for their next adventure in science. Let's introduce ourselves →
What might happen if you don’t equilibrate your flash cartridges.
"To equilibrate or not to equilibrate" flash Silica cartridges prior to loading the crude material and what possible risks you might face if you skip this step, read here →

“Alien vs. Predator”… or in other words “Silica vs. Alumina”
The rivalry between Silica and Alumina looks a lot like "Alien vs. Predator" movie, don't you think? Read more about how we can benefit from their "competition" →

The “Golden Mean” in Flash Chromatography
Which system describes perfectly the balance ratio between productivity and cost in flash chromatography? Open columns, automated or semi-automated systems?